

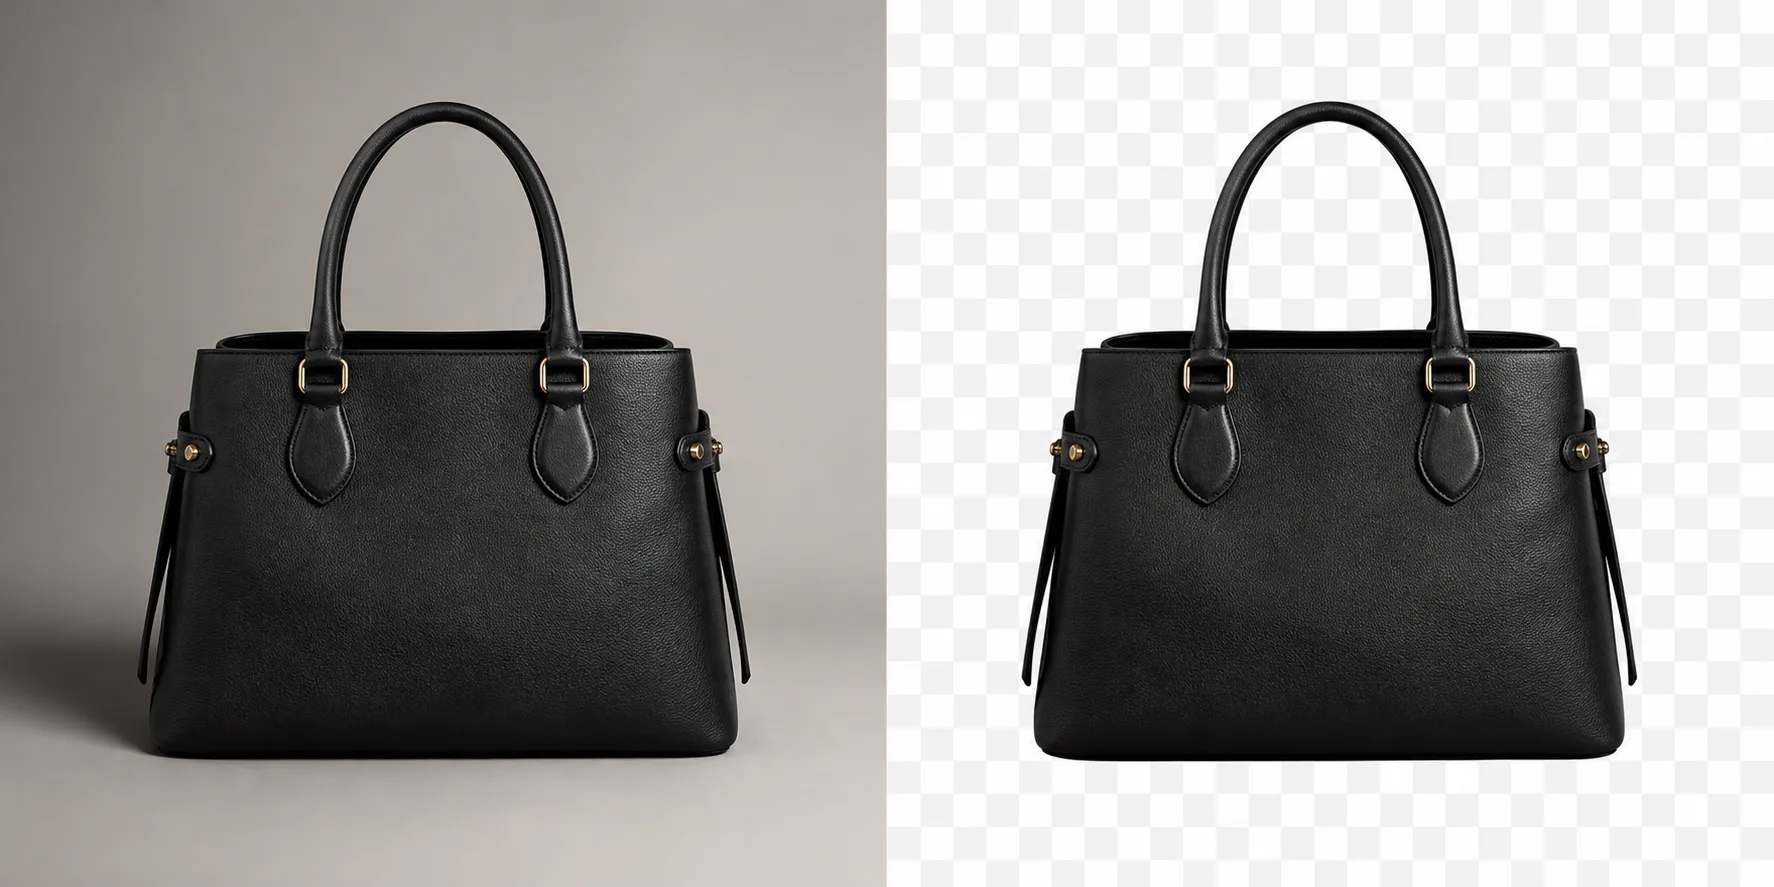
Remove the background without changing the job into a redesign
The Genify AI background remover separates the main subject from its surroundings and creates a transparent PNG. Upload one JPG, PNG, or WebP image up to 8 MB, review the preview, and submit the task. You can follow progress and open the completed result in Workspace.
Use background removal when you need a transparent product, person, logo, or design element for another layout. Use image-to-image instead when you want to change the style, scene, or composition. The guidance below explains how to prepare an image, avoid rough edges, and use the transparent PNG result.
How to remove an image background in Genify
This tool begins with an upload rather than a creative prompt because its job is to isolate the existing subject, not invent a new scene. After you choose a supported image, the page checks the file and shows a preview before you start background removal. If you need to sign in, the action button will guide you through that step.
After submission, Workspace shows the task progress and completed result. If the file or task needs attention, follow the message shown on screen.
Choose one supported image
Select one JPG, PNG, or WebP image no larger than 8 MB.
Check the preview
Confirm that the intended subject is visible and that the crop contains the edges you want the model to evaluate.
Replace or clear if needed
Before submission, use the existing controls to choose another image or remove the current selection without starting a task.
Start background removal
Submit the selected file. Genify will ask you to sign in if needed, confirm the required credits, and start the background-removal task.
Continue in the workspace
A successful submission opens Workspace, where you can follow progress and review the completed result.
Use the PNG in the next design
The completed result is a PNG file, which preserves transparent areas around the subject.
Supported files and current limits
Upload one JPG, PNG, or WebP image no larger than 8 MB. Unsupported formats and oversized files are rejected before a task begins. This tool processes one image per task and does not support batch uploads.
A PNG may already contain transparent areas, while JPEG does not support transparency. Either can work when the subject is clear. Genify saves the result as a PNG so the removed background can remain transparent.
- Accepted uploads: JPG/JPEG, PNG, and WebP.
- Maximum file size: 8 MB per image.
- Current interaction: one image is selected and submitted at a time.
- Unsupported file types are blocked before the task starts.
- Completed results are saved as PNG files with transparency support.
- Authentication is checked when the user starts the task, not when the public page is first opened.
Upload limits and accepted formats can change as the tool is updated. Check the upload area and any validation message for the current requirements.
What makes a cleaner background-removal input
An AI background remover estimates which pixels belong to the subject and which belong to the background. It works best when the subject has a clear outline and enough contrast from its surroundings. A product against a simple wall, a portrait with visible separation around the hair and shoulders, or a logo on a contrasting background is easier to process than an image where the subject and background share similar colors and textures.
If the source is extremely small or compressed, fine boundaries have fewer useful pixels. Begin with the clearest original, avoid unnecessary screenshots, and keep every subject edge that the final cut-out must contain. The tool removes a background but does not invent missing parts.
Transparent, reflective, blurred, or finely detailed subjects are more ambiguous because foreground and background overlap visually. Inspect those areas after completion and treat the cut-out as a starting point when exact production masking is required.
- Prefer a clear foreground subject with visible separation from the background.
- Use the original file when possible instead of a compressed screenshot.
- Keep the full subject inside the frame if the final cut-out needs complete edges.
- Reduce visual clutter behind fine details such as hair, fur, straps, or narrow product parts.
- Inspect transparent, reflective, blurred, or semi-transparent areas more carefully.
- Choose the source whose crop already matches the intended downstream layout.
Product, portrait, logo, and design use cases
A transparent foreground becomes useful when the subject needs to move into a new layout. The AI background remover does not create the final campaign, listing, presentation, or social post by itself; it prepares an asset that can be placed over another color, image, or composition. The best use case is one where isolation is the missing step and the subject should otherwise remain recognizable.
Product images
Remove a distracting shooting environment so the product can be placed on a consistent layout, catalogue card, or presentation slide. Check handles, cables, transparent packaging, shadows, and reflective surfaces because they can blend with the original background.
Portraits and profile graphics
Isolate a person for a profile image, speaker card, thumbnail, or social graphic. Hair and soft clothing edges need careful inspection, especially against a similarly colored background.
Logos and simple graphics
A logo on a flat background can be separated for another document or mock-up. Very small raster logos may show jagged edges; an original vector remains better for exact brand production when available.
Creative composites
Prepare a subject for a collage, layout test, concept board, or later transformation. Isolate first when transparency is the goal, then use a generative workflow only when a new image is required.
How to work with the PNG result
PNG is used because it can preserve an alpha channel, allowing the removed area to remain transparent. A transparent result may appear on a checkerboard in some editors, on white in others, or against the current page color depending on the viewer. That display does not always mean the background has returned. Place the image over a contrasting layer to confirm which pixels are transparent and which belong to the subject.
Before using the result, zoom in around the silhouette and inspect the areas that matter to the final placement. A small halo may be noticeable on a dark background even if it was hard to see on white. Likewise, dark hair can reveal missing detail when moved onto a bright color. Test the PNG on a background similar to the intended destination rather than evaluating it only in isolation.
For restyling, recomposition, or a new scene, continue with image to image. For a completely new visual from words, use text to image. Transparency prepares an asset; it does not finish the surrounding design.
Common edge problems and practical fixes
Background removal is a segmentation decision at every boundary. When the source gives weak evidence, the result can include missing foreground, leftover background, a colored fringe, or an edge that looks too hard. Begin by checking whether the source itself contains blur, compression, low contrast, or a cropped subject. A better original often helps more than repeatedly submitting the same difficult image.
If background remains around thin details, try a source with stronger separation. If hair or fur is cut too aggressively, use clearer lighting and less compression. Transparent objects and shadows may need separate review because their boundaries are visually ambiguous.
- Rough outline: start from a larger, less compressed original.
- Background fringe: test a source with stronger color or lighting separation.
- Missing hair or fur: avoid motion blur and backgrounds that match the edge color.
- Holes in the subject: inspect reflective, transparent, or patterned areas carefully.
- Unexpected shadow removal: decide whether the shadow is essential before choosing the source.
- Wrong tool for the goal: use image-to-image when you need a redesigned scene rather than a transparent cut-out.
Continue with the right image workflow
Background removal prepares a transparent asset. Choose a generative image page only when the next step requires a new visual rather than simple isolation.
- AI Image Generator — Compare the current text-led and reference-led image workflows.
- Image To Image AI — Restyle, refine, or recompose an uploaded reference after isolation.
- Text To Image AI — Create a new image from a written prompt when no source composition is required.
AI background remover questions
The answers below explain the file formats, size limit, output, and workflow currently supported by this tool.
- Can I use the AI background remover for free?
- Signed-in users receive daily free credits. Whether your current balance covers a removal task depends on the estimated credit cost shown before submission; uploading an image alone does not spend credits.
- Which image formats can I upload?
- The current tool accepts JPG/JPEG, PNG, and WebP. Unsupported formats are rejected before the background-removal request is submitted, so convert the source first when necessary.
- What is the maximum upload size?
- A single image can be up to 8 MB. Larger files are rejected before submission. If you need to reduce the file size, preserve edge detail because heavy compression can make fine or transparent areas harder to separate.
- What format is the completed result?
- The result is saved as a PNG, which supports transparent pixels. Place it over another color or image to check the edges before final use.
- How does it handle hair and product edges?
- The AI background remover works best when fine edges are sharp and visually separated from the background. Hair, fur, transparent packaging, reflections, and low-contrast product edges need close review against the background you plan to use.
- Where do I track the removal task?
- After a successful submission, Genify opens the task in Workspace. You can follow its progress and review the completed result there. If the task needs attention, follow the message shown on screen.
- Should I use background removal or image-to-image?
- Use the AI background remover for a transparent cut-out. Use image-to-image for a new generated version, restyle, or broader compositional change. They can be used in sequence but solve different jobs.