

What is text to image AI?
Text to image AI creates a new image from a written description. This prompt-to-image workflow does not require a starting frame: describe the subject, setting, composition, lighting, and visual direction you want the selected model to interpret.
Genify keeps this workflow focused: write the brief, choose the controls available for the selected model, submit the task, and review the result in Workspace. Generation speed still depends on the chosen model, current demand, and settings, so compare the options shown on screen and treat each result as a starting point for the next useful revision.
What can text to image AI do?
This workflow is useful when a written description is the clearest starting point for a new visual direction.
Explore a visual concept
Create an initial direction for an illustration, product scene, editorial image, campaign idea, or storyboard frame.
Control the composition
Describe the subject, viewpoint, framing, background, lighting, color, materials, and useful negative space.
Compare multiple directions
Keep the brief stable while changing one visual decision at a time, then compare the generated outputs in Workspace.
Prepare a next-step asset
Use a generated image as a visual reference for another image workflow or as the starting point for image-to-video generation.
Build a Text-to-Image Prompt in Seven Layers
A useful prompt reads like a compact visual brief. Each layer answers a different question, so a weak result can be revised without rewriting the whole idea. Not every prompt needs a long sentence for every layer, but the order keeps the most important decisions visible.
Subject → Setting → Composition → Viewpoint → Lighting → Materials → Atmosphere
- 01
Subject
Name the main person, object, place, or event first. Add the action or state that defines the image.
- 02
Setting
Place the subject in a specific environment and mention the time, weather, or context only when it affects the scene.
- 03
Composition
Describe placement, scale, negative space, foreground and background relationships, or the intended visual hierarchy.
- 04
Viewpoint
Choose camera distance and angle, such as close-up, eye level, overhead, low angle, or a three-quarter view.
- 05
Lighting
State the direction and quality of light: soft window light, hard noon sun, rim light, overcast daylight, or controlled studio light.
- 06
Materials
Name surfaces and textures that must read clearly, such as brushed metal, translucent glass, linen, wet asphalt, or matte ceramic.
- 07
Atmosphere
Finish with the emotional tone, pace, palette, or environmental feeling that should unify the image.
How to use the text to image generator
- 01
Define the visual goal
Decide what the image should communicate and where it will be used before writing the prompt. - 02
Describe the scene in layers
Start with the subject and action, then add setting, composition, viewpoint, lighting, color, atmosphere, and materials. - 03
Review model controls
Choose a model, then review the available aspect ratio, size, format, quality, and output settings shown in the generator. - 04
Generate and evaluate
Submit the task, open Workspace, and compare the result with the original brief before revising one decision.
Text to image inputs and outputs
The required input is a written prompt. The prompt can describe a subject, environment, action, composition, visual treatment, lighting, and intended use. No reference image is required for this workflow.
The output is one or more generated images, depending on the selected model and output count. Review the generator for the formats, dimensions, aspect ratios, quality settings, and credit estimate currently available.
Inputs
- A written visual prompt
- Optional prompt optimization when the interface provides it
Outputs
- Generated image results
- The selected output format, size, ratio, and quantity when supported
Current limits
- Prompt length and settings depend on the selected model
- Available controls and credit cost can vary by model
- Check the generator for current limits
Models and parameter controls
Genify exposes the models and controls supported by the current text-to-image workflow. A model may change the available image ratio, dimensions, quality, format, output quantity, or other options, so the control row should be reviewed before every submission.
Model selection
Choose the model according to the visual direction, speed, quality, and cost shown in the picker.
Aspect ratio and size
Match the frame to its destination, then use only the sizes and ratios supported by the selected model.
Format and output count
Review the available format and number of outputs before submitting so the task matches the intended review or delivery step.
Four Prompt Examples and What to Review
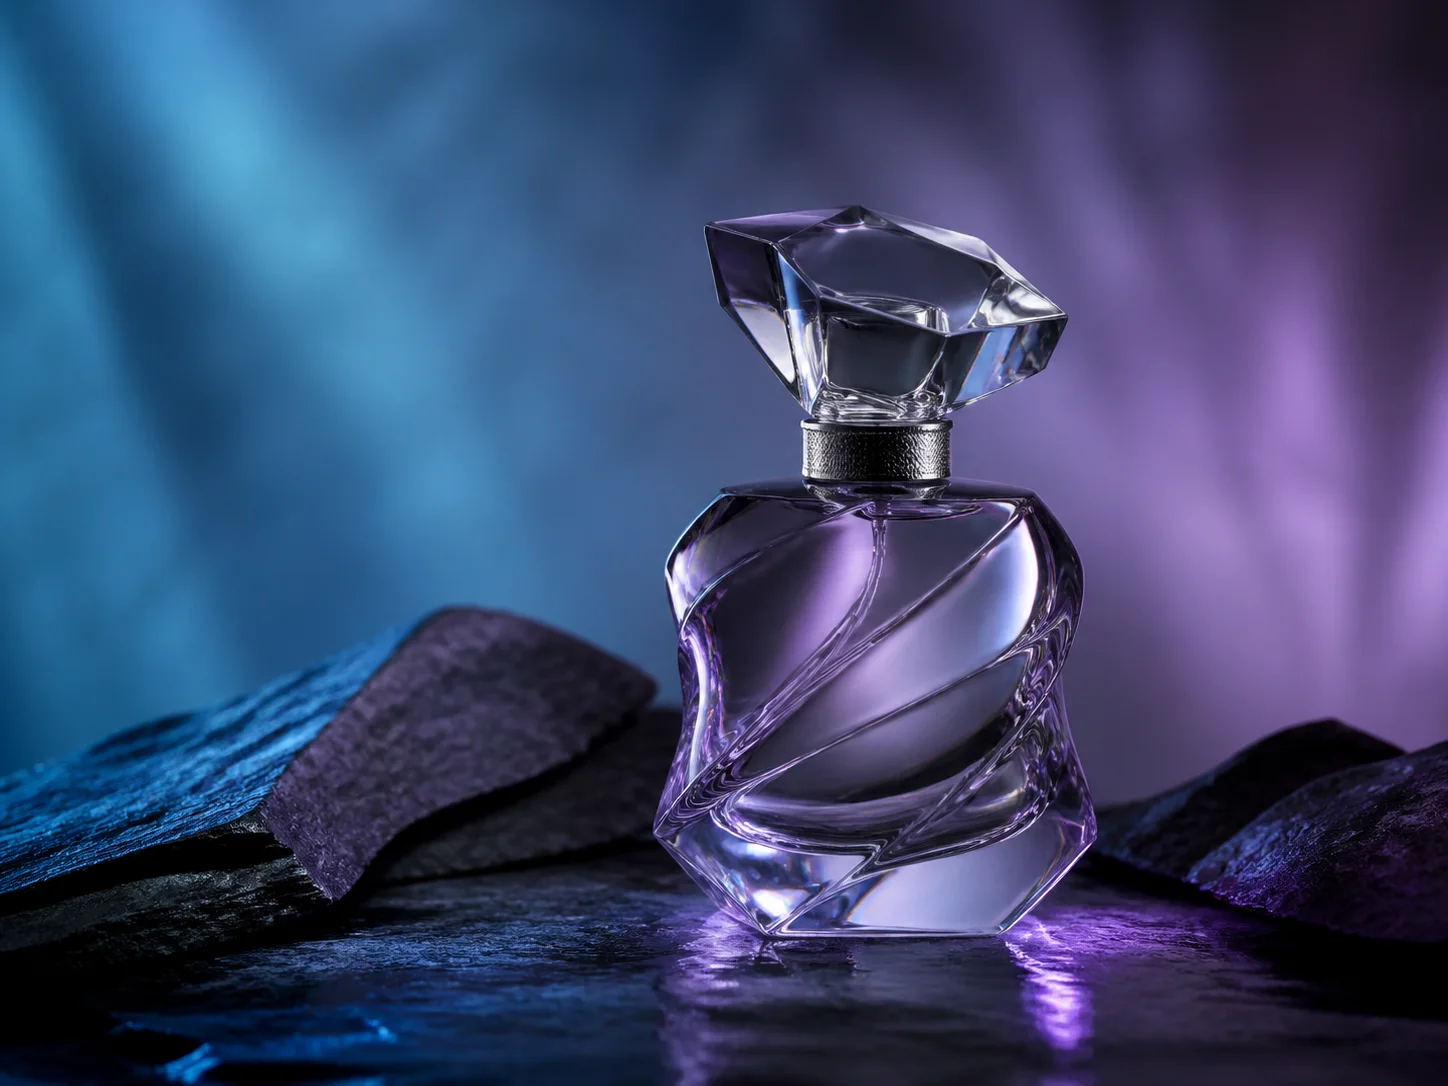
Product Image
A faceted violet perfume bottle on dark slate, centered hero composition, three-quarter product view, controlled blue and purple studio lights, crisp glass reflections, premium nocturnal atmosphere, no text.
Check the bottle silhouette, cap geometry, readable glass edges, controlled reflections, and enough separation from the dark background.
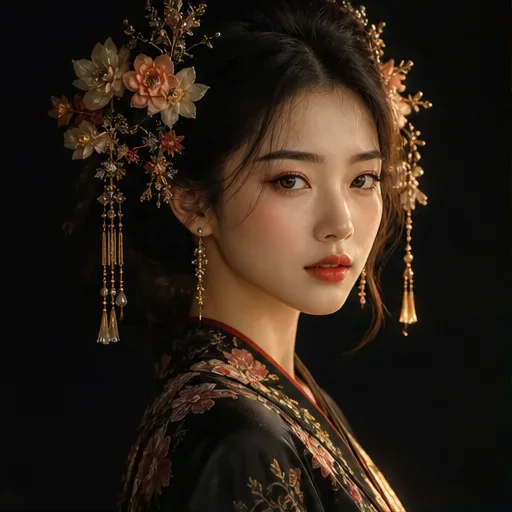
Editorial Portrait
Editorial portrait of a woman in embroidered black clothing with delicate floral hair ornaments, head-and-shoulders composition, three-quarter view, warm soft key light against a black background, fine textile detail, quiet formal mood.
Inspect facial coherence, the silhouette against the background, ornament detail, skin texture, and whether the lighting supports the intended formal tone.
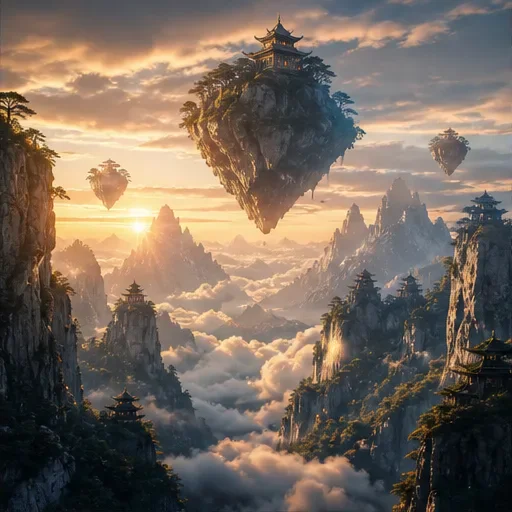
Concept Design
A vast mountain realm with floating temple islands above a sea of clouds, wide establishing composition, elevated viewpoint, sunrise backlight, weathered stone and pine trees, luminous epic atmosphere, one clear central island.
Look for a clear focal island, readable depth layers, believable scale, and light that connects the foreground, clouds, and distant peaks.
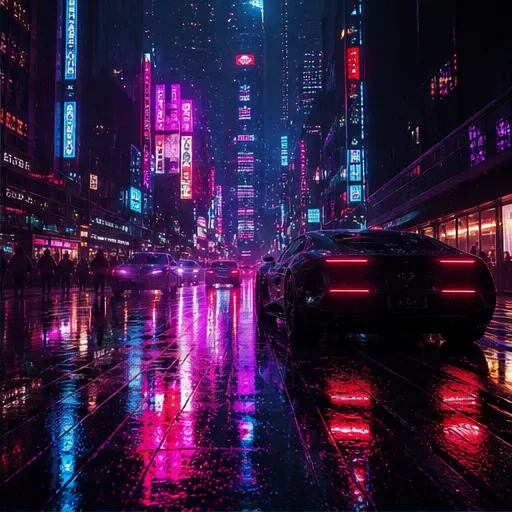
Storyboard Frame
A black sports car stopped on a rain-soaked neon city street at night, rear three-quarter composition, low camera angle, magenta and cyan signs reflected on wet asphalt, cinematic tension, open road visible ahead.
Check the direction of travel, negative space for the next shot, car proportions, reflection consistency, and whether the frame communicates one clear story beat.
Text to image AI use cases
Text to image is most useful when the team needs to explore or communicate a visual idea before a final production workflow begins.
Product and campaign concepts
Explore product scenes, campaign directions, social creative, and visual approaches before committing to a final composition.
Editorial and presentation visuals
Create supporting imagery for articles, presentations, moodboards, and story outlines while checking the result for factual accuracy.
Illustration and world building
Translate a written setting, character idea, object, or atmosphere into a visual reference that can guide later work.
Storyboard exploration
Generate visual starting points for a sequence by keeping the prompt structure consistent across scenes and frames.
Tips for better text to image results
The best prompt is not necessarily the longest one. It is the one that makes the important visual decisions easy to identify and revise.
- Name the subject and purpose before adding decorative adjectives.
- Describe one clear composition instead of combining several unrelated scenes.
- Change one dimension at a time when evaluating a new result.
- Choose the frame shape and output count according to the final use.
- Move to image-to-image when an existing image must remain recognizable.
Common Text-to-Image Failures and How to Fix Them
Diagnose the earliest mismatch between the brief and the result. Change one category at a time so the next generation explains whether the correction worked.
The subject is not clear
Move the primary subject to the opening phrase, remove competing subjects, and state its action, scale, or position in the frame.
Composition instructions conflict
Choose one framing and one focal hierarchy. Avoid combining close-up, full-body, overhead, and wide establishing directions in the same image.
The prompt is mostly adjectives
Replace generic praise words with visible decisions about subject, light, materials, color, camera position, and atmosphere.
Too many variables change at once
Keep the successful parts of the brief and revise only one major variable, such as composition, lighting, palette, or setting.
Related generators
- Image To ImageTransform a reference image with a written instruction.
- Text To VideoTurn a written scene into a short video.
- AI Image GeneratorCompare text-first and reference-first image workflows.